Category: Home Improvement

Costs of Kitchen Remodel Upgrades

A well-designed kitchen remodel makes your home a happier go-to space for cooking and socializing. The right upgrades can promote a healthier lifestyle by encouraging home-cooked meals and optimizing workflow.

Start with cabinetry. Ahmann suggests picking materials that won’t absorb spills, such as tile, vinyl, ceramic, or engineered wood. Contact Bathroom Remodel Richmond VA now!

How Long Does a Bathroom Remodel Take? | Rolox Home Service LLC

Cabinets are the backbone of your kitchen and can add value, function, and beauty to your home. The cost of cabinets will vary widely depending on the style and finish you select. Adding additional cabinetry will add to your total remodeling costs while modifying the layout or changing the design will also affect the price tag.

Three primary factors determine the cost of cabinets: size, scope and finish level. The larger your kitchen, the more cabinets you will need. Also, custom cabinets are more expensive than standard cabinetry because they are built to your exact specifications.

The materials you select for your cabinetry will also impact the final cost. Solid wood is more expensive than other cabinet materials, such as particleboard or MDF. It also takes longer to manufacture solid wood cabinets than it does to make MDF or plywood.

If you have existing cabinets that need updating, consider painting or refinishing them rather than replacing them. A fresh coat of paint or new doors can dramatically improve the look of your cabinets for a fraction of the cost of a complete remodel.

Another option is to reface your cabinets, which is more costly than simply painting them but less expensive than completely replacing them if they are in good condition.

Lighting is another item that can greatly impact your kitchen remodel budget. However, upgrading your lighting to energy-efficient LEDs is a relatively inexpensive addition that will greatly reduce your overall energy costs.

While a kitchen remodel is not a good time to start a DIY project, working with an experienced contractor can help keep your costs down and ensure your new kitchen is installed properly. Be sure to research contractors and ask for references before hiring one. A reputable and experienced contractor will be able to provide you with quality work that is both functional and beautiful. This will not only increase the value of your home, but will also make it a more enjoyable place to live and entertain.

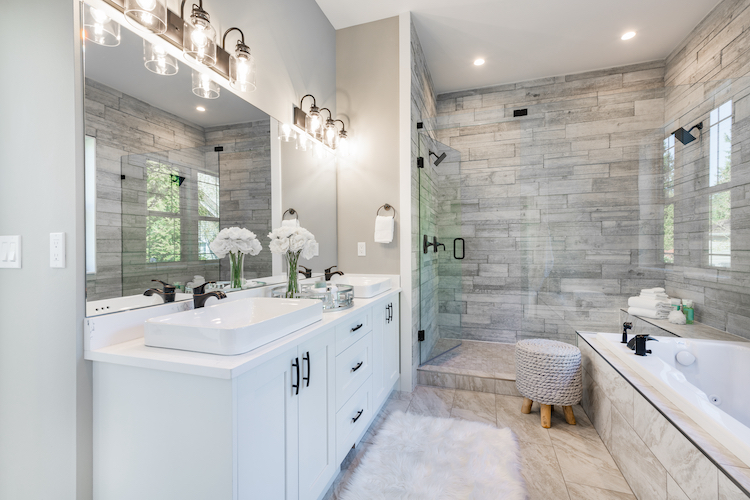
Countertops are a focal point that can set the tone for your entire kitchen remodel. The style you choose can impact cabinetry, paint colors, and even kitchen stools. However, the cost of countertops can be a big drawback for some homeowners, particularly if you opt for a material like marble, which is typically twice as expensive as laminate.

A popular choice is solid-surface materials such as granite and quartz. These durable and low-maintenance countertops can be made to match your cabinetry so they look seamless and unified. They also offer good stain resistance and are easy to clean. But if you prefer a warmer and more natural appearance, then wood countertops may be your best option. They are available in a wide range of species including maple, teak, cherry and hickory.

Another option is to use a mix of stone and solid-surface materials, which is more budget-friendly and still offers good stain resistance and ease of cleaning. One downside to this approach is that the seams between the different materials can show through and detract from the overall look.

If you’re looking for a unique option, consider poured concrete countertops. These are customizable to your kitchen and can be tinted and textured for a one-of-a-kind look. Just keep in mind that concrete is porous, so you’ll need to address spills immediately and follow a regular re-sealing schedule.

Backsplashes are designed to protect your walls from water, grease and other icky substances that can cause damage over time. Installing a backsplash is around 5% of your remodel cost, and it offers another chance to add some creative flair to your kitchen design.

It’s a good idea to install the countertops first, if possible, so that you can make sure the incoming backsplash and counter options are complementary rather than competing with each other for attention. However, if you fall in love with a dazzling backsplash design that speaks to your heart, then it can be worth going out of your way to install it before the countertops go in so that you can find a countertop option to compliment the design.

A backsplash is an extension of your countertops that protects kitchen walls from heat, moisture, grease and food splatters. It’s also an opportunity to add personality and flair to the room with a variety of design options, including color, pattern, and style.

Backsplashes typically feature a tile material, but there are many other options, such as glass, marble, and cork. Backsplash designs include solid colors, patterns, and even mosaics. The size, placement and shape of the backsplash can also be a focal point in the room and help to tie the space together.

When deciding on the style and layout of the backsplash, homeowners should take into consideration how they and their family use the space. It’s important to think about how the materials will hold up against the wear and tear of a busy family kitchen. A backsplash should be durable and easy to clean while still being visually appealing.

The most common and cost-effective option for a kitchen backsplash is ceramic tile. It’s durable, comes in a wide variety of styles and colors, and is relatively easy to install. Backsplashes can also be made out of natural stone, stainless steel, or other materials. The more expensive alternatives can offer better water, grease, and fire resistance.

Backsplash installation can be time-consuming and requires some expertise. It’s usually a good idea to hire a professional, especially if the homeowner wants to incorporate a complicated design or pattern. An experienced installer can ensure that the tiles are installed properly and adhere to drywall. They can also help the homeowner with design and color selection to make sure the backsplash matches the countertop and overall kitchen design.

Once the drywall is up, it’s important to have a local city or county supervisor visit to ensure that the construction is up to code. The supervisor will check the quality of the work and look for any mistakes or errors. If there are any problems, the contractor should fix them before moving on to the next step.

The next step in the kitchen remodel is to put on the finishing touches. This can be as simple as replacing cabinet handles and doorknobs or as complex as installing a new light fixture or bamboo window shades. This is an important step because it’s the part of the project that will show potential buyers the care and attention to detail that was put into the renovation.

Whether your existing kitchen appliances are functional or outdated, upgrading them can provide both style and efficiency. Newer cooktops, ovens and dishwashers are typically more energy-efficient than older models, and many come equipped with smart features that help you save time and money.

Before starting a kitchen remodel, consider how you plan to use the space and your lifestyle. You may want to invest in high-end, professional-grade appliances, or you might prefer to stick with an entry-level model that meets your basic needs. Whatever you choose, you should have a clear vision of what you want your finished kitchen to look like and how much it will cost, so you can avoid surprises when the project is underway.

It’s important to get estimates from several remodeling contractors before beginning a kitchen remodel. This allows you to compare prices and find the best fit for your budget. If you are financing your remodel, you can also ask lenders about interest rates and terms to ensure you’re getting the best deal.

Appliances are one of the most expensive line items in a kitchen remodel. In addition to the actual cost of the units, you’ll need to budget for installation, plumbing, electrical and gas work, including a new hood vent. You’ll also need to determine the type of cooktop you prefer – gas, electric or induction.

Professional chefs swear by gas, while induction cooktops are gaining popularity because they can boil water in just minutes and offer superior energy efficiency. But if you’re concerned about the price, consider that there are a number of options for less expensive cooktops that are just as efficient.

Another way to lower your kitchen remodel costs is to purchase a new refrigerator that’s smaller than the old one and replace the cabinet doors and hardware to match. This can make your kitchen feel like a whole new room for a fraction of the cost.

You can also look for deals and discounts on appliance sales, or shop for secondhand units. The COVID-19 pandemic has created supply delays in the manufacturing industry, so it may take 6-8 months to receive new appliances once you place your order. However, working with a professional can help you avoid this issue by coordinating delivery dates and working with vendors to resolve any issues.

What You Need to Know About Window Replacement

Window Replacement

Window Replacement is an important project that can increase a home’s value. It’s also a complex decision process that requires research into brands, models, and styles.Window Replacement

Start by reading online reviews and checking company BBB accreditation. Look for a double lifetime warranty or limited transferable warranties when the house is sold. Visit https://yourhomeexteriors.com/ to learn more.

To ensure that you get the right size replacement window, it is important to start by accurately measuring your existing window frame. Ideally, you’ll want to have an expert take these measurements for you. It will make the process much more straightforward.

Start by positioning your tape measure horizontally across the existing window frame at three points. This will give you the width measurement for the rough opening. Make sure to measure at both left and right side jambs as well as the bottom. The smallest number of these three measurements will be your rough opening width measurement.

You’ll also need to take the height and depth measurements for the rough opening. To do this, use your tape measure to position it diagonally from the inside corner of the top right side of the existing window frame to the inside corner of the lower left side of the window frame and record these measurements. Next, measure the distance between the head jamb (the vertical piece of trim on each side) and the sill (the bottom horizontal piece of trim). Finally, measure the distance from the bottom of the header jamb to the ground.

Once you have these measurements, add a half inch to both the width and the height. This allowance will ensure that the new window you order fits properly in your existing window opening and doesn’t leave any gaps. Additionally, it will allow for a bead of flexible sealant or caulking around the edges of the new window to prevent air leaks.

Aside from ensuring that your measurements are accurate, it is important to check that the window frame opening is square and level before ordering any new windows. Often, older homes are not square and this can lead to problems when installing replacement windows. A quick test with a level will confirm this.

Another tip from DunRite’s owner, Sal Sucato, is to subtract 3/8 of an inch from the width and height measurements before placing your product orders. This little bit of insurance gives the installer room to trim and adjust the window when it is set in place and will help accommodate for any shifting of the house over time.

Installation

When you replace windows, it’s important that the new window is both level and plumb to avoid gaps, water leaks, and poor energy efficiency. Installing a replacement window correctly takes time and expertise. This is why many homeowners hire a professional home improvement contractor to perform the window replacement.

The first step in the process is to remeasure the opening for the new window. This is important because the window opening may be larger or smaller than the original window. Unless this is remeasured, a new window that is ordered to the exact measurements of the old one would be too large in some corners and too small in others. This could make the window difficult to set into the opening properly and would not allow it to square vertically and horizontally correctly.

Once the opening has been remeasured, the trim boards around the window must be removed. This can be a messy job, but it should be done as carefully as possible to minimize damage to the existing wall and trim board. The existing sash should also be removed before installing the new window. This can be done by carefully removing the old sash and pulling the sash weight cords out of their grooves. The sash weight pulleys can be reinstalled if needed, but the sash should not be pushed in until after the wood interior stops have been replaced.

Before the new window is installed, the installer should apply a bead of elastomeric caulk around the inside edges of the exterior casings and blind stop moldings. This prevents water from seeping through the gaps between the window frame and the framed opening.

The installer should also check that the new window is level and plumb in the framed opening. Shims (long, thin beams with a slight wedge to them) are used to shift the gap and level the window. This will be a good opportunity to ensure the side jambs are straight, too. The installer should measure diagonally across the window from each corner and adjust the window until the measurements are equal.

Finishing

Many homeowners are reluctant to replace their windows if they don’t think the new window will fit in well with the existing style or color of the home. This is usually due to concerns about impacting the house’s character and the condition of the existing frames, especially if they are very rotted or otherwise compromised. In these cases, full frame replacement is often recommended. This means the old windows and sash are removed, the frame is rebuilt, insulation is installed, and the new window is inserted into the opening. It takes more time, materials and labor to complete, but it can be a good alternative if the current window isn’t functioning well or is too damaged for repair.

Across the industry, about 80% of window replacements are insert windows. This method involves removing the original window and its sash, and installing a new window with a trim casing around it. This leaves the interior and exterior woodwork intact, which makes it the most user-friendly option. It’s also the best choice if you want to change the style, type or shape of the window to something other than what was originally there.

If you choose this option, be prepared for the job to take more than one day. The crew will need to remove your existing sash, drywall and molding to get to the window frame. Before the crew arrives, you should move floor lamps and other hangings from the walls to prevent them from being knocked over, and cover furniture and other valuables. Ask the crew to place boards over any areas where they’re likely to scrape or damage your home’s finish, and lay down drop cloths in any areas where they will be working.

With the window ledge in place, you can measure and cut the side window casings to size. Start at the bottom of your window and use a straight edge to ensure the wall is perfectly level; nail each casing in place with an Arrow Fastener pneumatic brad nailer. Once the casing is in place, fill in any nail holes or mitered corners with wood filler.

Maintenance

When you’re ready to replace your windows, a qualified contractor can recommend different specs based on your budget and the amount of shade or sunlight each wall gets. They can also offer recommendations for window styles that suit your home’s aesthetic.

After the windows are installed, routine maintenance is essential to keep them in good condition and functioning at optimal levels. This includes checking for cracks, chips and stains. In addition to preventing moisture damage, this routine care will help your windows look their best and boost your curb appeal.

Brand new windows typically require less maintenance than older ones. However, the window frame material and style will influence how often they need attention. Wood frames are more prone to moisture damage, and should be regularly checked for moisture leaks and open seams that allow water to seep inside the home. Moisture build-up can lead to mildew and wood rot, and may require sanding and repainting.

Window frames made from vinyl, aluminum and metal are less prone to moisture problems, but they should still be inspected. These types of frames are generally easier to maintain than wood frames, since they do not need sanding and repainting as frequently. Sash tracks and sills should be kept free of dirt, debris and spider webs to prevent the accumulation of moisture.

Your new windows should be properly insulated to prevent moisture and heat loss, which will reduce your energy costs and help maintain a stable indoor temperature. Insufficient insulation can cause a gap between the window frame and the casing, which is both unsightly and an inefficient barrier to heat or cold. A professional can use elastomeric caulk to fill gaps less than 1/4 inch wide, but wider gaps should first be stuffed with foam-rubber backer rod.

It’s important to hire a reputable professional to install your replacement windows, and perform routine maintenance as necessary. Having properly sized, installed windows not only improves your home’s appearance and energy efficiency, but can also increase its value. Before beginning any work on your replacement project, your professional can assess the state of your foundation and make sure that your windows will be structurally sound.

How to Prepare Walls and Ceilings for Interior Painting

painter

Painting interior walls is an easy and cost-effective way to refresh the look of a room. Interior painters at https://bunburypaintingservice.com.au/ often follow trends in color to give rooms a fresh, updated look. Interior paint should be durable, washable, and easy to touch up. It should also have a low or zero VOC (Volatile Organic Compounds) to avoid health and environmental concerns.

Preparation

painter
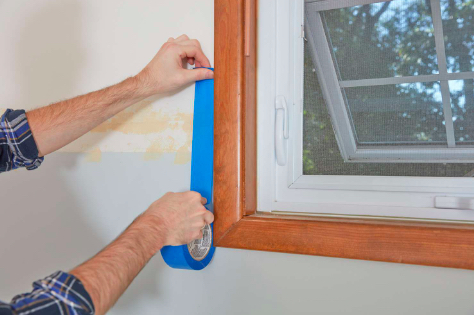
Home interior painting can transform a space, creating the perfect backdrop for your furniture, decor and lifestyle. It’s also one of the best return-on-investment home improvement projects, boosting your property value and helping you sell your home faster.

A good paint job starts with a well-prepared surface. This is especially true for interior painting, where the smallest flaws can stand out and ruin the finished product. Fortunately, there are several simple steps you can take to prep your home for interior painting.

Begin by moving any large objects out of the way, and then remove smaller items like rugs, mats, curtains and wall hangings. If you can, it’s a good idea to clear everything out of the room completely, as this will prevent dust or drips from getting on them during the painting process. It’s also a good idea to cover up any light switches and outlets, as this will protect them from dust or paint.

During the prep process, your local CertaPro Painter will assess your home’s interior, including determining if any repairs are needed to ensure a high-quality finish and long-lasting paint job. This may include patching holes and cracks, replacing rotting or damaged wood trim, and removing old wallpaper. These repairs will help ensure a smooth, professional-quality paint job and will increase the longevity of your interior paint project.

It’s also important to choose the right type of paint for your home’s interior. There are many different types of interior paint, and each is designed for specific surfaces and finishes. For example, latex paint is easy to clean and dries quickly, while oil-based paint takes longer to dry but provides a stronger and more durable finish.

Walls

Walls are the canvas for your interior color scheme, so it’s important to prepare them properly. Professional painters always clear the area of furniture, use a drop cloth and clean walls with sugar soap or another mild solvent. This step helps prevent dust and grease from interfering with the smooth, even surface you want.

You may also need to sand rougher walls before painting. Using a fine-grit sandpaper will help remove any bumps or ridges that can cause uneven paint application. It’s important to lightly sand both sides of your trim, as well, in order to ensure that the edges blend in with the wall.

A great way to add texture to a wall is by stenciling. Whether you’re using an individual letter stencil for words or a complete word stencil, this technique gives your room a unique touch that will stand out against other wall colors. It’s best to choose a color lighter than your existing wall shade for this technique.

One of the most common mistakes that people make when painting a wall is not keeping a wet edge. A wet edge allows the cut and roll to dry together, resulting in an even, professional finish. It will also avoid “hatbanding,” “picture framing” and “flashing,” which are all caused when a painted edge dries before the rest of the wall, creating noticeable borders between areas of paint.

A lot has changed in 32,000 years since we first started slapping paint up on cave walls, but the fundamentals remain the same. Today’s interior paint is a sophisticated cocktail of pigments and resins that contribute to adhesion, gloss, durability, scrub and stain resistance, moisture and crack resistance and more. There are even paints that are low- or no-VOC, which reduce the amount of VOC gasses released into your home while you’re painting.

Ceilings

A paint job on a ceiling can make a room feel bigger, cozier or brighter, depending on the color you choose. If you want the best results, it’s essential to prepare the ceiling in the same way you would prepare walls: Masking with painter’s tape where walls meet the ceiling, and removing hardware like window locks and lifts, doorknobs and strikes, and light cover plates is critical to prevent paint drips from marring your carpet, floorboards or tiles. You can also protect furniture that can’t be moved with dust sheets or drop cloths, and use them as a barrier between your painting space and the rest of the house.

If your ceiling is textured, apply a coat of a high-build primer, such as Zinsser Peel Stop Triple Thick High-Build Binding Primer, before you start painting. It’ll help fill in any grooves or imperfections, ensuring a smooth finish for your topcoat. Allow it to dry completely before proceeding with your painting.

You’ll be better off using a roller for most ceilings, as it will give you a much more even coverage than a brush. With a 3/8-inch (for flat ceilings) or 1/2-inch nap roller, paint in small sections (3 to 4 square feet), keeping the area wet and feathering out the edge of the paint with every stroke to avoid lap marks.

For areas you’ll be covering with a second coat, apply a cut-line first. It’s a good idea to use a 4-inch brush fully loaded with white emulsion, which is cheaper than a colored emulsion and works well as a basecoat. Begin at the corner of the room and work towards a light fixture, or anywhere else that might show a seam.

Trim

Painting the trim in your home is an excellent way to update the look and feel of any room. Fresh paint can make your home more welcoming to guests and potential buyers, and it is also an easy way to increase the value of your property.

Properly prepping your trim is essential to ensure that the final result looks great. You should use wood filler on any rough areas of the surface and sand the filler down to a smooth, even finish. It’s important to remove any existing paint that is peeling and to clean the surface thoroughly with sugar soap or a TSP solution before priming and painting. You should also caulk any gaps or cracks in the trim before applying the new coat of paint.

Most pros recommend using oil-based paint for trim because it dries more slowly than water-based paint, which helps it level out better and leave fewer visible brush strokes. However, if you are a beginner or aren’t confident that you can achieve the same results as professionals, a high-quality water-based paint may be a good choice.

You should choose a semi-gloss or gloss finish for your trim because it will be easier to wipe down and will protect the surface from damage and wear over time. Flat finishes can also be easier to work with, but they won’t hold up to moisture well and may show scrubbing marks over time.

When it comes to painting your trim, you should start in a dry area and apply the paint with short, overlapping strokes. You should then let the paint dry and touch up any areas that need more coverage or aren’t as even as you would like.

Touch-Ups

When touching up paint, it’s important to keep in mind the texture of the wall surface. This helps to blend the touch-up into the rest of the wall. The touch-up should be performed using the same applicator as was used on the last coat of paint on that section of the wall — whether a brush or roller. A roller with a small nap thickness is preferred. When using a brush, it’s best to “feather” the edges of the touch-up in order to help minimize any noticeable edge line. This is done by lightly tipping the brush in multiple directions.

It’s also important to match the color of the touch-up to the original paint on the wall. However, it’s not always possible to achieve this because of factors like fading and sheen differences.

Touch-ups work well on flat or low sheen paint, but they can be difficult to blend into aged and faded satin, semi-gloss and gloss paint. One way to lessen the impact is to use a paint reducer on the touch-up in order to help it blend better.

If you find that a touch-up is not successful or if the paint on the wall is very damaged, it may be necessary to repaint from “break to break” which means painting from moldings and corners down to baseboards. This is more work, but it will result in a smooth and consistent appearance of the entire room.

Prior to doing a touch-up, it is important that the damaged area be thoroughly cleaned in order to get the best results. If dirt or grime is not removed, the touch-up will not adhere to the wall and can cause it to flake or blister. After the cleaned area is dry, it’s recommended to prime it in order to provide good adhesion and color blending.

How to Plan a Successful Kitchen Remodel

Kitchen Remodel

Kitchen Remodel San Diego can improve daily life and add value to your home. However, it can be overwhelming and costly if you don’t plan correctly.Kitchen Remodel

Observe how you use your kitchen and make design decisions that reflect that. For example, consider where you’ll store items like pots and pans. Also, look into installing drawers in place of shelves as they offer more functionality.

A beautiful, well-appointed kitchen is a selling point for your home and a great way to boost its value. However, upgrading the heart of your home is not without its pitfalls. The key to a successful kitchen remodel is knowing your budget and being realistic about the changes you can make.

A kitchen remodel is a major undertaking and will require an investment of time, money, and energy. Before you even think about hiring a kitchen contractor, having a clear vision for your remodel project is important. This will help you find design ideas, materials, and contractors that fit your needs and budget.

Kitchens are one of the most expensive rooms to remodel, so it is essential to set a realistic budget and stick to it. Many remodeling projects go over budget due to unexpected issues, such as unforeseen costs for plumbing or electrical upgrades. It is also important to include an additional 10-20% of your total remodel cost in reserve for unexpected expenses.

It is a good idea to consult with a professional kitchen designer to get an accurate estimate for the entire project. This will ensure that your project is completed on time and on budget. A kitchen designer will be able to anticipate your needs and provide you with personalized design options.

It is also a good idea to work with a local kitchen contractor who can help you navigate the process and avoid costly mistakes. In addition to providing an expert eye, a local kitchen contractor will know what types of upgrades are in demand in your area and can connect you with reputable kitchen designers and contractors.

Design

A kitchen remodel encompasses a lot more than new cabinets or counters. It also involves a lot of decision making in terms of floorplans, materials and lighting. Having clear goals for your kitchen remodel will help you to make the right decisions. Whether you are looking for a more efficient layout or a better look, these goals should be in mind throughout the entire process.

One of the most important factors in a successful kitchen design is the layout. This will affect how the space is used and where everything is located. Keep in mind that relocating plumbing or electrical will add to the cost of the project. It is best to work with a professional during this step of the process.

Another consideration is the location of appliances and storage. It is a good idea to keep items that are frequently used close together, to save time and energy. For example, it is convenient to have a place for mugs and coffee grounds near the coffee machine. This will save your groggy morning self from having to walk too far for a cup of java. Similarly, it is useful to store wraps and plastic containers near the dishwasher for ease of loading and unloading.

Personal touches are an excellent way to enhance the overall appearance of a kitchen. However, it is important not to go overboard with customization. If you over-customize your kitchen, it may not appeal to future home buyers, and it could decrease the amount of money you get back when selling the property. It is best to choose features that would be appreciated by a wide range of individuals.

Layout

Choosing the layout for your kitchen remodel is one of the most important aspects of your project. The layout determines how your space will work and how you and your family can use it. The best kitchen floorplans maximize space while allowing for a comfortable, functional workflow.

A well-designed kitchen is an essential part of any home. The layout should be easy to navigate, with clear pathways between the sink, stove and refrigerator. It should also include plenty of storage space and be equipped with the latest appliances. A poorly designed kitchen can be a nightmare to cook in, trapping cooking odors and posing health hazards. A kitchen should be a place where you can prepare meals and spend time with your family.

Galley kitchens, also called corridor kitchens, are a great choice for small spaces. This lean layout is efficient and works well for single cooks. For larger spaces, consider an L-shaped kitchen or U-shaped design with a large center island. The island offers extra workspace and storage, and it can double as a breakfast bar or casual dining area.

The U-shaped kitchen is a popular option for large spaces. This layout includes cabinets and appliances along three walls, creating a u-shape that is open on one end. This layout is ideal for multi-tasking and allows two cooks to work at once without bumping into each other.

The L-shaped kitchen is a good choice for tighter spaces. This layout features cabinets and appliances on two adjoining walls, allowing for a continuous flow of workspace. This layout is flexible and can accommodate multiple cooks, a breakfast bar or a dining area.

Materials

Every kitchen remodeling project starts with gathering the right materials. Whether you are going for a full-on remodel or just some small tweaks, you will need to figure out how much the project is going to cost and what materials you want to use. Choosing the wrong material can end up costing you more in the long run. So take your time to research the best prices on your materials and choose a trusted contractor that has good connections with local suppliers.

A kitchen remodel is a great opportunity to upgrade your appliances. Not only will newer appliances look better, but they will also be more energy-efficient and less likely to break down. Plus, upgrading your appliances can increase your home’s safety by reducing the risk of fire and electric shocks.

You can also update your kitchen with new decor, which is another easy way to refresh your space. For example, you can add a colorful pendant light over your sink or replace dated window treatments with bamboo shades. These upgrades are a cost-effective way to create a beautiful new kitchen.

Moreover, kitchen remodeling can improve the resale value of your home. It is no secret that homebuyers are willing to pay a premium for homes with updated kitchens. So, if you are considering selling your house in the future, a kitchen remodel can be a smart investment that will pay off.

Having the kitchen of your dreams is within reach with a little planning and creativity. Whether you want a bright, airy design or a modern feel, you can find the perfect fit for your lifestyle with the help of kitchen professionals. You can even get creative with your design by using planning software that allows you to visualize the results of your kitchen renovations in 3D.

Contractors

Kitchen remodels are expensive and time-consuming. If you’re not confident in your DIY skills, hiring a contractor to do the heavy lifting is best. But be sure to research the pros you’re considering, including references from satisfied friends and neighbors, online reviews, and local and national industry association memberships. It’s also a good idea to schedule an initial phone consultation or in-person meeting with your top picks before hiring them.

When choosing a contractor, ask about their education, training, and certifications. Then, verify that they hold a valid license and insurance policy. It’s also a good idea for homeowners to find out how long the company has been in business.

Home Improvement Ideas on a Budget

Getting new floors in your house may seem like a good idea, but there are hidden costs that many homeowners don’t realize. Installing new floors may also reveal problems with your foundation. The good news is that there are several cost-effective home improvement ideas that don’t require a professional contractor. If you’re on a budget, you don’t have to sacrifice your dream of a beautiful home. Just consider these tips when you’re planning a home improvement project:

Adding natural plants can give a room a completely new look. They brighten up a room, making it more inviting and welcoming. You don’t need to hire a contractor or spend a fortune to install a planter. You can even make your own planters out of recycled materials! You can install a variety of plants on your walls, adding a pop of color to your home. Whether you’re going for a more modern look, a more classic look, or something in between, there are many ways to change the look of your space.

Plants are a great way to add color and life to your home. The bright colors of plants will bring life to any room and make it more inviting to visitors. Adding live plants to a room can help create a warm and cozy environment that’s perfect for entertaining guests. The best thing about planters is that they don’t require expensive materials. Instead, you can make your own with recycled materials or old materials. A planter is an inexpensive way to improve the look of your home without breaking the bank.

Another affordable home improvement idea is adding natural plants to your home. Bringing in a variety of flowers, ferns, and other plants can make any room look brighter, livelier, and more inviting. A planter is one of the best home improvement ideas on a budget. You don’t have to spend a lot of money to add planters. You can also use used pots, wine crates, and other discarded objects to make the planter.

A planter can be made from old bottles of wine and other household items. This can be a great home improvement idea for a limited budget. For example, you can replace your old vases with more modern ones. If you’re on a budget, you can install a planter by using recycled materials. If you don’t have any of these, you can purchase inexpensive planters. The best part about these ideas is that they are low-cost.

An accent wall is a great way to make a room look more spacious. A wall with accent colors can also be used to add a pop of color to an otherwise bland room. While accent walls can transform an entire room, they can be a significant investment. The cost of an accent wall is usually dependent on the size of the accent wall. In contrast, a painted wall of fully white or taupe can be a very expensive home improvement.

Adding natural plants is another great home improvement idea that can make any room look more inviting. Aside from bringing nature into your home, they also make your living space brighter and more welcoming. By installing planters in your living spaces, you can make them look more inviting to visitors. While you don’t have to buy expensive planters, you can use used pots and other household items to create a planter. This home improvement idea is one of the best on a budget.

Natural plants can make your living space look more inviting. These plants can make any room bright and lively. They also make a room feel more welcoming. If you are on a budget, installing planters in your home can be an easy home improvement idea. There are many different types of planters, and you don’t have to buy anything new. You can also use old pots, and reuse other materials to create a planter.

If you are on a budget, an accent wall is an affordable, time-saving home improvement idea. It can make a difference in the look of a room, as natural plants can make it look more welcoming. And because it doesn’t require a lot of money and time, it’s a perfect home improvement idea for a budget. A fully white or taupe wall is a classic choice. However, you can use an accent color to give your room a pop of color.