Author: Edwin Rost

Insulation Remover – Why You Should Leave it to the Professionals

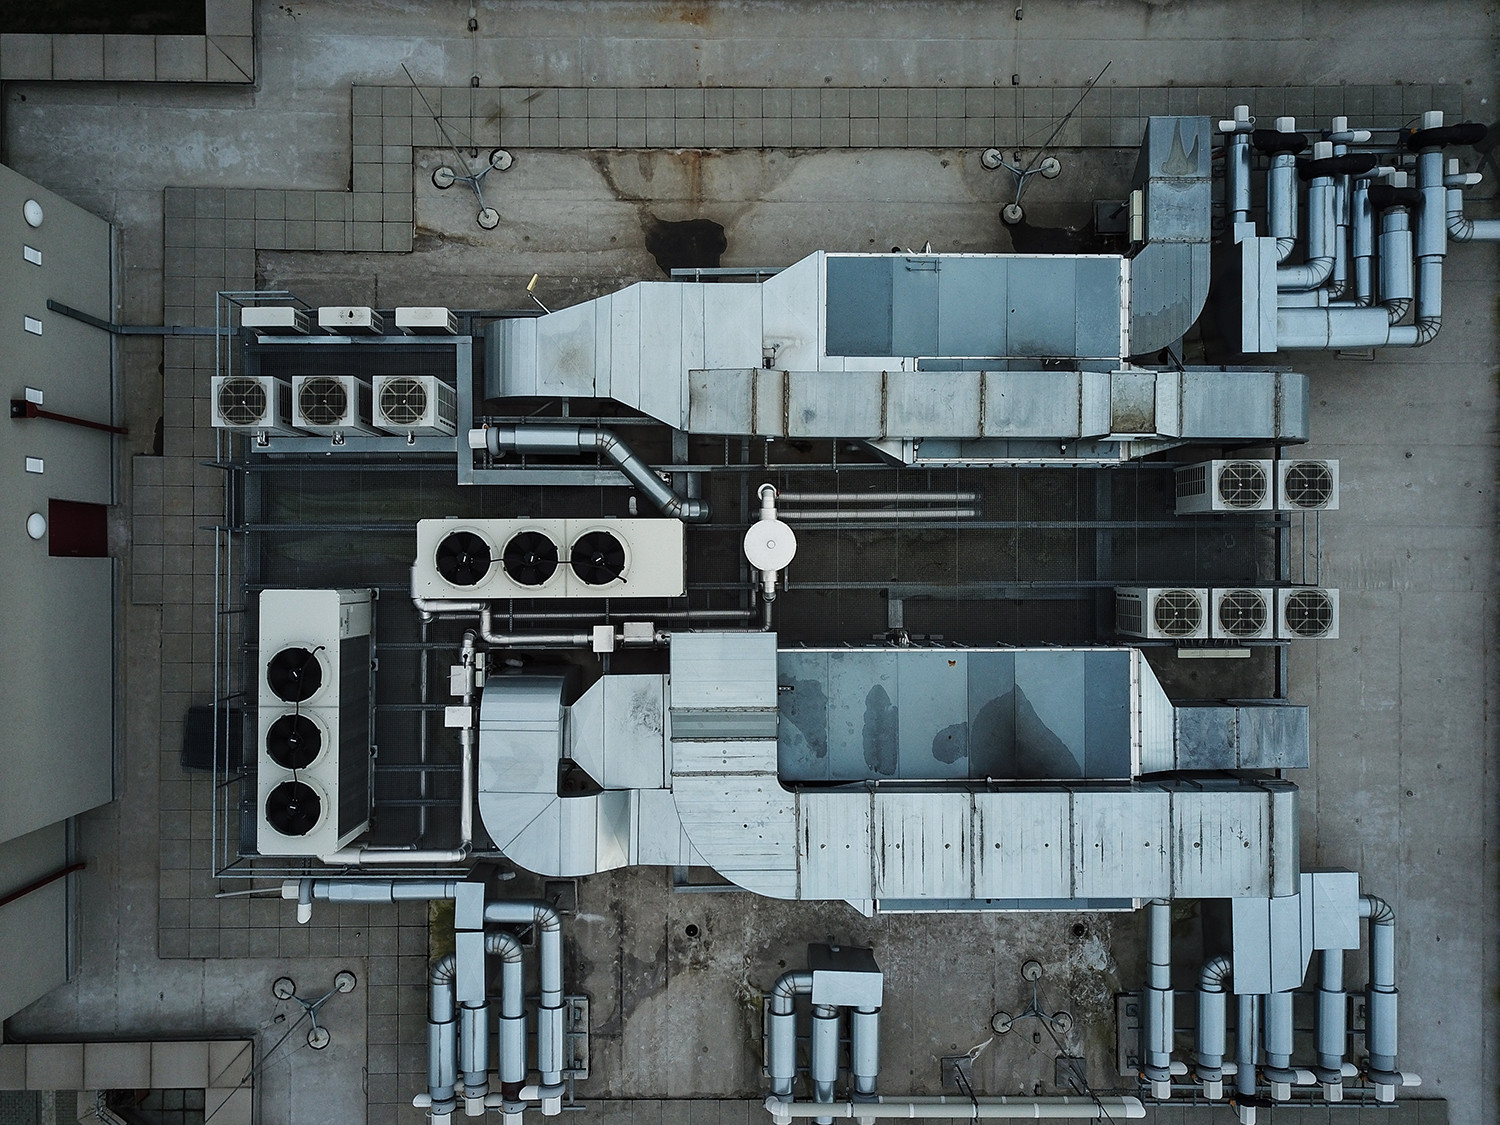
If you have blown-in cellulose or fiberglass insulation, the best way to remove it is with an insulation vacuum system. This process is safer and more efficient than manual removal.

Before starting, wear protective gear to avoid eye and skin irritation from fiberglass particles. You’ll also need a high-powered vacuum and disposal bags. For more information, click the Perth Insulation Remover to proceed.

How to Remove Blown in Insulation from Your Attic

Insulation Remover is a flammable material that poses fire risks in the event of improper handling or installation. This is why it is important for homeowners to follow safe protocols when installing insulation. It is recommended that they seek professional assistance for large-scale projects that require the use of Insulation Remover.

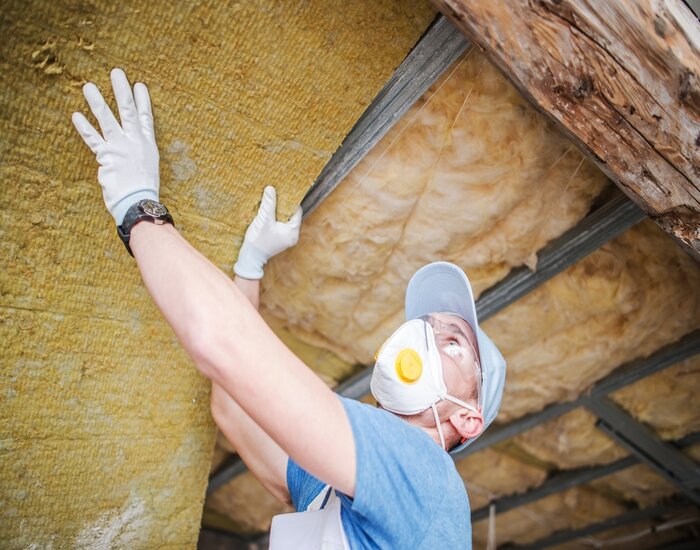
Before embarking on a home insulation removal project, it is essential to acquire all necessary equipment and protective gear. This includes: a strong vacuum and heavy-duty waste bags, gloves, goggles, dust masks and safety glasses. These pieces of equipment are crucial for protecting against loose particles and allergens, such as mold spores and dander from pests. Moreover, it is imperative to ensure that the workspace is clear of all personal items and that it is properly ventilated.

One of the most important safety tips is to shut off or disconnect power sources in the attic before commencing with insulation removal. This will help avoid the risk of accidental contact with live wires, which can lead to electrical shocks and potentially fatal injuries. It is also advised to prepare a work area and identify the type of insulation being removed, as different types of insulation require unique removal methods. For example, fiberglass batts release small particles that can cause irritability to the skin and eyes, while cellulose and mineral wool are composed of fibrous materials that are not as abrasive and do not release dangerous particles.

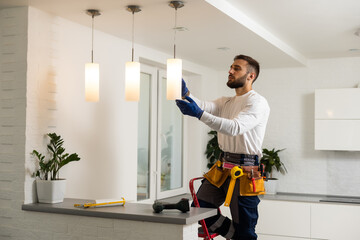
Another important safety tip for removing attic insulation is to wear appropriate clothing and use sturdy ladders to minimize the risk of falls or accidents. It is important to wear long sleeves, pants and closed-toed shoes, as the insulation fibers can irritate the skin. It is also advisable to use disposable coveralls for added protection.

A number of reasons may necessitate the removal of old attic insulation, including rodent infestations, water damage, and decreased effectiveness due to age. In these cases, old insulation often becomes a breeding ground for mold and mildew, which can trigger asthma and other respiratory problems in sensitive individuals. It can also contribute to air quality issues, as toxins and odors from the mold will permeate the house through cracks or leaky ducts.

Insulation is a good way to protect your home from the cold, but it can become damaged over time due to pest infestation, mold growth and water damage. When this happens, the insulation becomes less effective and poses health risks for the residents of the home. It is essential to remove and replace damaged insulation so it does not continue to cause problems for the residents.

One of the most common reasons to remove old insulation is because of rodent infestation. Mice and rats love to nest in the soft fibers of the insulation where they can create a cozy place to have their babies. They also leave their urine and droppings in the insulation which can lead to respiratory issues and other diseases when inhaled. If you notice rodent activity in your attic, you should have the insulation removed immediately to prevent an infestation.

Old or damaged insulation can also be a health hazard because it can attract allergens like dust and mold spores. These allergens can become airborne and trigger allergy symptoms, such as itchy eyes and a runny nose, in the residents of your home. Moldy and wet insulation can also pose a structural risk for the home as it can start to decay or even rot in areas where it is exposed to moisture.

The preferred method for removing blown in insulation is through the use of a special vacuum process to suck out the material from the attic. A professional company will have this equipment and can safely complete the job for you. If you decide to do it yourself, be sure to follow strict safety procedures. Cover up all walls and floors in the attic, and put protective gear on before you begin. It is a good idea to have a helper to monitor the vacuum while it is working so that you do not inhale any unhealthy particles.

Some types of insulation, such as urea formaldehyde and carcinogenic asbestos, are extremely toxic and should never be handled without the proper equipment. These types of insulation must be removed by a professional who will take precautions to ensure the safety of your family and neighbors.

Many pests, such as rodents and cockroaches, carry disease-causing germs and pose health risks to humans. They can contaminate food, damage furniture and fabrics, trigger allergies and respiratory problems, and cause structural damage that weakens the integrity of a building. Pest infestations can also devalue property and increase the need for costly repairs and replacements.

Pests often invade homes in search of food, water and shelter. They are drawn to crumbs and spills, pet food left out, and puddles or condensation on windows and walls. Rodents, roaches, and other pests are attracted to damp areas where they can breed. Humidity is another important factor in attracting these unwanted guests. Humid environments are easier for pests to thrive in than dry ones, as they do not need to expend energy regulating their body temperature.

In addition, homes are filled with hiding places, perfect for pests to live and breed in. They are found underneath furniture, in corners where walls meet, in attics, and inside wall cavities. Keeping these areas clean and free of clutter helps to avoid pest infestation.

A lack of natural predators is also a major contributor to pest infestations. Outside, there are many animals that feed on pests and prevent their reproduction, but in an indoor environment, these natural enemies are absent. Pests are therefore more likely to breed and develop into adulthood, and they are also more likely to leave their young unattended.

Many people have a misconception that a pest problem will disappear if they remove the pests. However, this is not always the case, and a pest infestation can quickly recur as soon as the pests are removed from their hiding place. This is why it is so important to prevent pests from entering in the first place.

Incorporating good hygiene practices into daily routines, storing food and other items in tightly closed containers, and swiftly removing food debris can help to keep pests at bay. In addition, avoiding shrubs that grow near or touch your home, repairing leaky pipes, and installing insect screens on doors and windows can all help to minimize pest infestations.

Insulation Remover can help clear out old insulation that’s releasing trapped odors and particulates into your indoor air. It can also release trapped moisture and critters that have been making their home in your insulation. This is why you should leave it to professionals. They use a high-powered vacuum that can efficiently collect the materials and leave your home healthy, clean and safe.

An online survey was conducted to evaluate people’s perception towards aesthetic inclusion in Internal Wall Insulation (IWI) renovation. The results of the survey showed that participants were willing to pay a premium for aesthetics in IWI which can help overcome their negative concern such as cost and loss of space in their homes.

As a writer for RetroFoam of Michigan, Amanda uses her background as a journalist to create content that educates homeowners on the benefits of foam insulation. In her spare time, she enjoys spending time with her husband and rescued huskies. She is also a fan of the Detroit Tigers and the Minnesota Twins. If you have any questions, feel free to contact her at any time!

Costs of Kitchen Remodel Upgrades

A well-designed kitchen remodel makes your home a happier go-to space for cooking and socializing. The right upgrades can promote a healthier lifestyle by encouraging home-cooked meals and optimizing workflow.

Start with cabinetry. Ahmann suggests picking materials that won’t absorb spills, such as tile, vinyl, ceramic, or engineered wood. Contact Bathroom Remodel Richmond VA now!

How Long Does a Bathroom Remodel Take? | Rolox Home Service LLC

Cabinets are the backbone of your kitchen and can add value, function, and beauty to your home. The cost of cabinets will vary widely depending on the style and finish you select. Adding additional cabinetry will add to your total remodeling costs while modifying the layout or changing the design will also affect the price tag.

Three primary factors determine the cost of cabinets: size, scope and finish level. The larger your kitchen, the more cabinets you will need. Also, custom cabinets are more expensive than standard cabinetry because they are built to your exact specifications.

The materials you select for your cabinetry will also impact the final cost. Solid wood is more expensive than other cabinet materials, such as particleboard or MDF. It also takes longer to manufacture solid wood cabinets than it does to make MDF or plywood.

If you have existing cabinets that need updating, consider painting or refinishing them rather than replacing them. A fresh coat of paint or new doors can dramatically improve the look of your cabinets for a fraction of the cost of a complete remodel.

Another option is to reface your cabinets, which is more costly than simply painting them but less expensive than completely replacing them if they are in good condition.

Lighting is another item that can greatly impact your kitchen remodel budget. However, upgrading your lighting to energy-efficient LEDs is a relatively inexpensive addition that will greatly reduce your overall energy costs.

While a kitchen remodel is not a good time to start a DIY project, working with an experienced contractor can help keep your costs down and ensure your new kitchen is installed properly. Be sure to research contractors and ask for references before hiring one. A reputable and experienced contractor will be able to provide you with quality work that is both functional and beautiful. This will not only increase the value of your home, but will also make it a more enjoyable place to live and entertain.

Countertops are a focal point that can set the tone for your entire kitchen remodel. The style you choose can impact cabinetry, paint colors, and even kitchen stools. However, the cost of countertops can be a big drawback for some homeowners, particularly if you opt for a material like marble, which is typically twice as expensive as laminate.

A popular choice is solid-surface materials such as granite and quartz. These durable and low-maintenance countertops can be made to match your cabinetry so they look seamless and unified. They also offer good stain resistance and are easy to clean. But if you prefer a warmer and more natural appearance, then wood countertops may be your best option. They are available in a wide range of species including maple, teak, cherry and hickory.

Another option is to use a mix of stone and solid-surface materials, which is more budget-friendly and still offers good stain resistance and ease of cleaning. One downside to this approach is that the seams between the different materials can show through and detract from the overall look.

If you’re looking for a unique option, consider poured concrete countertops. These are customizable to your kitchen and can be tinted and textured for a one-of-a-kind look. Just keep in mind that concrete is porous, so you’ll need to address spills immediately and follow a regular re-sealing schedule.

Backsplashes are designed to protect your walls from water, grease and other icky substances that can cause damage over time. Installing a backsplash is around 5% of your remodel cost, and it offers another chance to add some creative flair to your kitchen design.

It’s a good idea to install the countertops first, if possible, so that you can make sure the incoming backsplash and counter options are complementary rather than competing with each other for attention. However, if you fall in love with a dazzling backsplash design that speaks to your heart, then it can be worth going out of your way to install it before the countertops go in so that you can find a countertop option to compliment the design.

A backsplash is an extension of your countertops that protects kitchen walls from heat, moisture, grease and food splatters. It’s also an opportunity to add personality and flair to the room with a variety of design options, including color, pattern, and style.

Backsplashes typically feature a tile material, but there are many other options, such as glass, marble, and cork. Backsplash designs include solid colors, patterns, and even mosaics. The size, placement and shape of the backsplash can also be a focal point in the room and help to tie the space together.

When deciding on the style and layout of the backsplash, homeowners should take into consideration how they and their family use the space. It’s important to think about how the materials will hold up against the wear and tear of a busy family kitchen. A backsplash should be durable and easy to clean while still being visually appealing.

The most common and cost-effective option for a kitchen backsplash is ceramic tile. It’s durable, comes in a wide variety of styles and colors, and is relatively easy to install. Backsplashes can also be made out of natural stone, stainless steel, or other materials. The more expensive alternatives can offer better water, grease, and fire resistance.

Backsplash installation can be time-consuming and requires some expertise. It’s usually a good idea to hire a professional, especially if the homeowner wants to incorporate a complicated design or pattern. An experienced installer can ensure that the tiles are installed properly and adhere to drywall. They can also help the homeowner with design and color selection to make sure the backsplash matches the countertop and overall kitchen design.

Once the drywall is up, it’s important to have a local city or county supervisor visit to ensure that the construction is up to code. The supervisor will check the quality of the work and look for any mistakes or errors. If there are any problems, the contractor should fix them before moving on to the next step.

The next step in the kitchen remodel is to put on the finishing touches. This can be as simple as replacing cabinet handles and doorknobs or as complex as installing a new light fixture or bamboo window shades. This is an important step because it’s the part of the project that will show potential buyers the care and attention to detail that was put into the renovation.

Whether your existing kitchen appliances are functional or outdated, upgrading them can provide both style and efficiency. Newer cooktops, ovens and dishwashers are typically more energy-efficient than older models, and many come equipped with smart features that help you save time and money.

Before starting a kitchen remodel, consider how you plan to use the space and your lifestyle. You may want to invest in high-end, professional-grade appliances, or you might prefer to stick with an entry-level model that meets your basic needs. Whatever you choose, you should have a clear vision of what you want your finished kitchen to look like and how much it will cost, so you can avoid surprises when the project is underway.

It’s important to get estimates from several remodeling contractors before beginning a kitchen remodel. This allows you to compare prices and find the best fit for your budget. If you are financing your remodel, you can also ask lenders about interest rates and terms to ensure you’re getting the best deal.

Appliances are one of the most expensive line items in a kitchen remodel. In addition to the actual cost of the units, you’ll need to budget for installation, plumbing, electrical and gas work, including a new hood vent. You’ll also need to determine the type of cooktop you prefer – gas, electric or induction.

Professional chefs swear by gas, while induction cooktops are gaining popularity because they can boil water in just minutes and offer superior energy efficiency. But if you’re concerned about the price, consider that there are a number of options for less expensive cooktops that are just as efficient.

Another way to lower your kitchen remodel costs is to purchase a new refrigerator that’s smaller than the old one and replace the cabinet doors and hardware to match. This can make your kitchen feel like a whole new room for a fraction of the cost.

You can also look for deals and discounts on appliance sales, or shop for secondhand units. The COVID-19 pandemic has created supply delays in the manufacturing industry, so it may take 6-8 months to receive new appliances once you place your order. However, working with a professional can help you avoid this issue by coordinating delivery dates and working with vendors to resolve any issues.

How to Prepare Walls and Ceilings for Interior Painting

painter

Painting interior walls is an easy and cost-effective way to refresh the look of a room. Interior painters at https://bunburypaintingservice.com.au/ often follow trends in color to give rooms a fresh, updated look. Interior paint should be durable, washable, and easy to touch up. It should also have a low or zero VOC (Volatile Organic Compounds) to avoid health and environmental concerns.

Preparation

painterHome interior painting can transform a space, creating the perfect backdrop for your furniture, decor and lifestyle. It’s also one of the best return-on-investment home improvement projects, boosting your property value and helping you sell your home faster.

A good paint job starts with a well-prepared surface. This is especially true for interior painting, where the smallest flaws can stand out and ruin the finished product. Fortunately, there are several simple steps you can take to prep your home for interior painting.

Begin by moving any large objects out of the way, and then remove smaller items like rugs, mats, curtains and wall hangings. If you can, it’s a good idea to clear everything out of the room completely, as this will prevent dust or drips from getting on them during the painting process. It’s also a good idea to cover up any light switches and outlets, as this will protect them from dust or paint.

During the prep process, your local CertaPro Painter will assess your home’s interior, including determining if any repairs are needed to ensure a high-quality finish and long-lasting paint job. This may include patching holes and cracks, replacing rotting or damaged wood trim, and removing old wallpaper. These repairs will help ensure a smooth, professional-quality paint job and will increase the longevity of your interior paint project.

It’s also important to choose the right type of paint for your home’s interior. There are many different types of interior paint, and each is designed for specific surfaces and finishes. For example, latex paint is easy to clean and dries quickly, while oil-based paint takes longer to dry but provides a stronger and more durable finish.

Walls

Walls are the canvas for your interior color scheme, so it’s important to prepare them properly. Professional painters always clear the area of furniture, use a drop cloth and clean walls with sugar soap or another mild solvent. This step helps prevent dust and grease from interfering with the smooth, even surface you want.

You may also need to sand rougher walls before painting. Using a fine-grit sandpaper will help remove any bumps or ridges that can cause uneven paint application. It’s important to lightly sand both sides of your trim, as well, in order to ensure that the edges blend in with the wall.

A great way to add texture to a wall is by stenciling. Whether you’re using an individual letter stencil for words or a complete word stencil, this technique gives your room a unique touch that will stand out against other wall colors. It’s best to choose a color lighter than your existing wall shade for this technique.

One of the most common mistakes that people make when painting a wall is not keeping a wet edge. A wet edge allows the cut and roll to dry together, resulting in an even, professional finish. It will also avoid “hatbanding,” “picture framing” and “flashing,” which are all caused when a painted edge dries before the rest of the wall, creating noticeable borders between areas of paint.

A lot has changed in 32,000 years since we first started slapping paint up on cave walls, but the fundamentals remain the same. Today’s interior paint is a sophisticated cocktail of pigments and resins that contribute to adhesion, gloss, durability, scrub and stain resistance, moisture and crack resistance and more. There are even paints that are low- or no-VOC, which reduce the amount of VOC gasses released into your home while you’re painting.

Ceilings

A paint job on a ceiling can make a room feel bigger, cozier or brighter, depending on the color you choose. If you want the best results, it’s essential to prepare the ceiling in the same way you would prepare walls: Masking with painter’s tape where walls meet the ceiling, and removing hardware like window locks and lifts, doorknobs and strikes, and light cover plates is critical to prevent paint drips from marring your carpet, floorboards or tiles. You can also protect furniture that can’t be moved with dust sheets or drop cloths, and use them as a barrier between your painting space and the rest of the house.

If your ceiling is textured, apply a coat of a high-build primer, such as Zinsser Peel Stop Triple Thick High-Build Binding Primer, before you start painting. It’ll help fill in any grooves or imperfections, ensuring a smooth finish for your topcoat. Allow it to dry completely before proceeding with your painting.

You’ll be better off using a roller for most ceilings, as it will give you a much more even coverage than a brush. With a 3/8-inch (for flat ceilings) or 1/2-inch nap roller, paint in small sections (3 to 4 square feet), keeping the area wet and feathering out the edge of the paint with every stroke to avoid lap marks.

For areas you’ll be covering with a second coat, apply a cut-line first. It’s a good idea to use a 4-inch brush fully loaded with white emulsion, which is cheaper than a colored emulsion and works well as a basecoat. Begin at the corner of the room and work towards a light fixture, or anywhere else that might show a seam.

Trim

Painting the trim in your home is an excellent way to update the look and feel of any room. Fresh paint can make your home more welcoming to guests and potential buyers, and it is also an easy way to increase the value of your property.

Properly prepping your trim is essential to ensure that the final result looks great. You should use wood filler on any rough areas of the surface and sand the filler down to a smooth, even finish. It’s important to remove any existing paint that is peeling and to clean the surface thoroughly with sugar soap or a TSP solution before priming and painting. You should also caulk any gaps or cracks in the trim before applying the new coat of paint.

Most pros recommend using oil-based paint for trim because it dries more slowly than water-based paint, which helps it level out better and leave fewer visible brush strokes. However, if you are a beginner or aren’t confident that you can achieve the same results as professionals, a high-quality water-based paint may be a good choice.

You should choose a semi-gloss or gloss finish for your trim because it will be easier to wipe down and will protect the surface from damage and wear over time. Flat finishes can also be easier to work with, but they won’t hold up to moisture well and may show scrubbing marks over time.

When it comes to painting your trim, you should start in a dry area and apply the paint with short, overlapping strokes. You should then let the paint dry and touch up any areas that need more coverage or aren’t as even as you would like.

Touch-Ups

When touching up paint, it’s important to keep in mind the texture of the wall surface. This helps to blend the touch-up into the rest of the wall. The touch-up should be performed using the same applicator as was used on the last coat of paint on that section of the wall — whether a brush or roller. A roller with a small nap thickness is preferred. When using a brush, it’s best to “feather” the edges of the touch-up in order to help minimize any noticeable edge line. This is done by lightly tipping the brush in multiple directions.

It’s also important to match the color of the touch-up to the original paint on the wall. However, it’s not always possible to achieve this because of factors like fading and sheen differences.

Touch-ups work well on flat or low sheen paint, but they can be difficult to blend into aged and faded satin, semi-gloss and gloss paint. One way to lessen the impact is to use a paint reducer on the touch-up in order to help it blend better.

If you find that a touch-up is not successful or if the paint on the wall is very damaged, it may be necessary to repaint from “break to break” which means painting from moldings and corners down to baseboards. This is more work, but it will result in a smooth and consistent appearance of the entire room.

Prior to doing a touch-up, it is important that the damaged area be thoroughly cleaned in order to get the best results. If dirt or grime is not removed, the touch-up will not adhere to the wall and can cause it to flake or blister. After the cleaned area is dry, it’s recommended to prime it in order to provide good adhesion and color blending.

The Benefits of Junk Removal

Junk Removal

Whether you’re downsizing for a move or simply trying to declutter, junk removal can be a time-consuming and challenging task. Thankfully, there are companies that specialize in junk removal.Junk Removal

Prices vary depending on the volume of junk you have. Some companies charge by the truckload, while others may have a minimum fee. Visit Website to learn more.

A junk removal service can quickly and efficiently get rid of large furniture pieces, such as a sectional sofa or entertainment center. Unlike garbage bagged and brought to the curb each week for collection, junk services typically charge by the truckload. Consequently, the cost of junk removal increases as the volume of furniture being removed increases.

For example, a single couch might only cost $60 or $75 to remove; however, the price can quickly increase to more than $500 for two couches, four chairs, and an entertainment unit. The exact price depends on the size of the items being removed, whether they have to be disassembled, and if any hazardous materials are involved.

When comparing the cost of junk removal to renting a dumpster, keep in mind that the time spent sorting and hauling furniture (and then icing your back and taking painkillers) may cancel out any savings. Moreover, if you have multiple pieces of unwanted furniture to dispose of, a junk removal service can often offer a bulk discount.

Furniture that is free of major damage, rips, or holes can often be donated to local charities and secondhand stores. This is a great option because it helps reduce the amount of trash that ends up in landfills, while providing people in need with usable furniture.

If your furniture is still in good condition, but you’d rather not bring it to a charity, you can try selling it at a yard sale or on Craigslist. You can also leave it by the curb in front of your house on trash day. However, you should be aware that doing so could potentially violate your homeowner’s association’s rules. Also, if the weather is unseasonably warm or cold, your furniture may be exposed to the elements for an extended period of time, which can cause it to deteriorate or mold. Ultimately, this can make it more difficult to sell. Fortunately, most junk removal companies will take your unwanted furniture and donate it or recycle it. In some cases, they will even donate e-waste to local computer recycling programs.

Appliances

Appliances are a staple in most homes, but as time goes by they’re bound to stop working and start taking up space. Rather than let them sit there and gather dust, it’s a good idea to have the appliances taken away so they can be properly disposed of. The main issue here is that large appliances are heavy and require a truck or trailer to haul them away. This is not something that can be done with a small car, even if you have a dolly and furniture straps to help you move the items.

One option for getting rid of old appliances is to contact your local utility company to see if they offer an appliance recycling program. Many of these programs will give you a credit or waiver on your next bill in exchange for picking up your old appliances and disposing of them properly.

Another great option for getting rid of your old appliances is to donate them to a local charity. There are plenty of charities that accept appliances in all shapes and sizes, and they often have people who can come pick them up for you. Just be sure to call ahead and ask if they accept any specific models.

A final option for getting rid of old appliances is to take them to a scrap metal recycling center. These places will recycle the components and materials inside your appliances and may even pay you for them. This is a good alternative to throwing them in the dumpster, since scrap metal is usually not allowed in landfills.

It’s important to find a junk removal service that is committed to eco-friendly practices. Most appliances are made from scrap metal, and the best option is to choose a junk removal service that will recycle as much of this material as possible instead of dumping it in a landfill. A reputable junk removal company like Junk King will make sure that as much of the scrap metal from your old appliances is recycled as possible, and they will also ensure that the rest of the materials in your appliances are disposed of safely and responsibly.

Electronics

Computers, TVs and cell phones are some of the most common consumer electronics that end up as junk. Collectively called e-waste, these items make up one of the fastest growing portions of America’s waste stream. They contain hazardous materials such as lead and mercury that can pose a threat to the environment if they are not properly recycled. Responsible e-waste recycling protects the environment, saves resources and creates jobs.

Many municipalities now have dedicated e-waste recycling programs. These programs may be free to use or require a small fee, depending on the municipality and its policies. Check with your city’s public works department or search online for a local household hazardous waste facility to learn more about e-waste disposal options in your area.

Some municipalities also hold periodic e-waste drop-off events. Some e-waste collection events focus on specific products, such as computers and TVs, while others are general and accept all unwanted electronic equipment. Check local advertisements for upcoming e-waste collections to find out more information.

In addition to these government and municipal programs, some nonprofits accept working electronics as donations. Homeless and domestic violence shelters often need working televisions, while schools, libraries and adult education programs can use functional computers. Many charities also accept working cellphones, although be sure to contact the organization you plan to donate to to ensure they are accepting these devices.

If you need to get rid of a computer or TV, you can sell it on Craigslist or another marketplace site. It is important to remove all personal data from the device before donating or selling it. You should also remove rechargeable batteries, which are considered hazardous waste. If you have a large quantity of electronics that you need to get rid of, it is best to hire a junk removal service that offers e-waste recycling. These services will carefully dismantle the items and recycle as much of the material as possible to avoid harming the environment. These services can cost between $60 and $200 for a single item, with a reduced cost per additional piece.

Yard Waste

While it’s easy to take out the trash each week, junk can pile up quickly and become overwhelming. Junk removal services can help you get rid of unwanted items by sorting and hauling them away. But not all junk is the same, and different types of waste require separate disposal processes.

For example, you can’t place hazardous waste in the same bin as household garbage, and most junk removal companies don’t accept it. That’s why it’s important to ask questions about what kinds of materials a company can or cannot accept.

A good junk removal service will be able to identify items that are suitable for recycling or donation, and they’ll be able to handle the rest. This will help the environment by reducing landfill space and creating a more sustainable solution to waste disposal.

Junk removal services can be a great resource when you need to declutter your home or business. Whether you’re preparing for a move, cleaning out an office, or simply clearing out unused items, they can help you create a more organized and functional space. And with so many options available, it’s easier than ever to find a junk removal company that meets your needs.

Many cities have curbside collection for yard waste, which is a type of organic material that includes grass clippings and leaves, small branches and twigs, and shrub and bush trimmings. This type of waste can be composted to reduce the need for landfills and produce a useful soil amendment. However, some items should not be mixed with yard waste, such as animal waste, plastic items, and treated wood (such as railroad ties or chemically-treated ground-contact lumber). These items can spoil the compost and make it unusable, so it’s important to check the list of accepted materials before placing your yard waste at the curb.

For large amounts of yard waste, you can bring it to a local drop-off site for free. These sites are open 7:30 a.m. to 4 p.m. Monday through Friday, and 7:30 a.m. to noon on Saturday. The Anne Arundel County Landfill also accepts yard waste, and it’s a good option for residents who have more than 10 bags of curbside yard waste per week.

The Basics Of Residential Electrical Installation

electrical installation

Residential electrical installation involves working with wiring, panels, and circuitry. It is usually best to work with a professional electrician or experienced electrical construction team for this type of project. Most newer homes use plastic-sheathed wiring, commonly called Romex cable. Wire gauges and other information are often printed on the sheathing. 

A residential electrical service upgrade is an important project that requires the attention of a licensed and insured professional. When you hire an electrician for the job, make sure they are experienced and licensed in your state. They will take the time to review your home’s wiring and breaker system before completing the work. electrical installationWiring

The wiring in a residential electrical installation is what connects all the appliances, lights, and other features in a house to make them work. It can seem like a maze of wires and connections, but some basic rules can help you avoid electrical shock or fire. First, remember to always turn off the power at the breaker box before working on electrical wiring. This is especially important when you’re working in an older home with outdated wiring.

Next, determine what type of wiring you need for your project. Most modern homes use nonmetallic (NM) cable, which consists of a package of wires wrapped inside a colored sheathing. The color coding on NM cables helps you identify which wire is hot, neutral, or ground. It’s also a good idea to label the ends of each wire, so you know which end goes to the outlet or switch.

Depending on the size and type of project, you might need to install additional cables for lighting or power distribution. When this is the case, it’s a good idea to consult your local building department or electrician to ensure you have the proper wiring in place.

Another common method of electrical wiring is batten wiring, which uses insulated wires run through straight teak wooden battens that are fixed to walls and ceilings with tinned brass link clips. This method is more efficient than the CTS / TRS wiring and can be used for both domestic and industrial projects. It is not, however, suitable for long-distance power distribution. It is therefore not recommended for large commercial projects, or use outdoors. However, it is ideal for smaller residential installations.

Outlets

Despite their seeming simplicity, electrical outlets are an important part of your home’s wiring system. They supply power to household appliances and lighting. They also provide a way to recharge phones and tablets. Electrical contractors need to ensure that the outlets in a home are up to code. This includes ensuring that the outlets are spaced properly and have the correct types of outlets for each room. This helps prevent accidents, such as overheating wires, from occurring.

For residential wall outlets, local codes often dictate how the outlets should be spaced and what types of outlets are to be used in different rooms. These guidelines usually derive from the National Electrical Code (NEC), a model code that communities can adopt as they see fit. For example, a code may specify that the spacing between kitchen outlet locations is six feet to prevent homeowners from stretching cords too far and creating safety hazards.

Most residential outlets are traditional two-pronged, grounded receptacles with either three or four connection slots. The third slot is designed to accommodate a grounding pin to help prevent electric shocks. This type of outlet is inexpensive and easy to replace. But for increased safety, it’s a good idea to upgrade to tamper-resistant outlets.

These outlets have internal shutters that open only when a two-pronged plug is inserted. This helps to prevent children from sticking their fingers into outlets and potentially being shocked. Another type of outlet to consider is a ground fault circuit interrupter outlet or GFCI. These are designed to protect against electric shock from outlets near water sources like bathrooms, kitchens, and laundry areas. Finally, you may want to consider a combination outlet, which has both a switch and a traditional pronged outlet in the same outlet box.

Switches

Switches allow you to control lights or appliances from one, two, or more wall locations. They can be toggle, rocker, or slider, but the style doesn’t affect how a switch functions or what wiring it needs. There are single-pole, three-way, and four-way switches designed for standard 120-volt household circuits as well as double-pole switches for specialty 240-volt circuits that power large appliances such as stoves. Some switches are smart, letting you control lighting and appliances with voice commands or an app on your phone.

The first step in replacing a switch is to turn off the circuit power at the breaker panel and mark the breaker or fuse so you know it’s OFF. Next, open the switch box and disconnect the wires, leaving the hook ends of each wrapped around a screw terminal in the switch. The black (hot) wires connect to the brass screw terminals on each side of the switch. If you have a 3-way switch, you may also have a black common wire that’s connected to the shortest of the white (neutral) wires in the switch box and labeled “common” with tape or a marker.

When you replace a switch, make sure the new switch is rated for the circuit voltage and amperage, then close the breaker or fuse and screw in the switch. Before connecting the wires to the switch, put a piece of electrical tape on the common wire so you’ll remember to treat it differently later on. Then connect the hooks of the two black wires to their respective terminal screws on the switch, wrapping each around the screw in a clockwise direction. Wrap the white traveler wires together in the same manner.

Subpanels

Subpanels are used to take the extra electricity load off of your main circuit breaker panel. This can prevent the overloading of your electric system, which can cause a fire hazard. It also helps to increase the safety of your property, as you can quickly turn off the subpanel in case of a fire or other emergency.

A subpanel is a small breaker box that sends and transfers electricity to other areas of your property. It can be installed in your garage, workshop, or other area that needs an extra electrical circuit. It is also possible to add a subpanel in your basement, as it can be a convenient place for your laundry room or home theater.

These breaker boxes are often smaller than your main breaker panel, and they look similar. They can also have a single or multiple breakers. If you install a subpanel in your garage, for example, it can help to organize your equipment and make it easier to identify which switches are powered by each circuit. Subpanels are usually placed at a height that is high enough so that children and pets cannot reach them, but they can still be easily accessed when you need to do maintenance or make repairs.

A subpanel can be installed at any location where you need more electrical circuits, but it is typically located close to the main power panel. This can make wiring and connections easier and minimize the length of the feeder cable that will need to be run from the main panel to the subpanel. However, a subpanel can’t increase the amount of power that your house can accept, so if you need more power, it may be better to upgrade your main panel instead of adding a subpanel.

Circuit Breakers

The circuit breakers in your home are the safety devices that cut off the current whenever it jumps above a safe level. They are the modern replacements for older fuse wires, which were designed to disintegrate when they overheated from too much current. The main breaker panel and rows of circuit breakers connect to hot bus bars that carry electricity from the power company to your home’s wiring and outlets.

The simplest kind of breaker switch is a spring-loaded design that uses stored energy to throw the switch, cutting off the circuit. More advanced circuit breakers use semiconductor elements to monitor current levels and shut off the flow of electricity before it can damage your home or cause an electrical fire.

If a circuit breaker trips, you must open the door of the breaker box and flip the switch to the “Off” position before you can turn on your appliances and electronics again. If you find that your breaker keeps tripping, there may be a serious problem with your wiring or other components and you should contact an electrician for help.

A residential electrical contractor can install a new panel that has more amp capacity and additional breakers to handle the demands of your household. You will probably also need a professional to replace the wires that bring electricity from the power company and connect them to your breaker box and switches.

How To Be Successful With Article Marketing


Article marketing is a great way to get your product or business known, which will bring in a substantial income. However, the only way to be successful at article marketing is if you know how. The following article will give you advice on how to properly use article marketing to your advantage.


A great way to market your blog on the internet is by submitting articles to other websites under your “nom de plume.” The significance is two-fold: first, you will build your reputation as an expert in your field. Second, if readers become fans of your articles on one site, they will eventually migrate to your blog to read more of your content.


Keep your content easily accessible no matter how long ago that it was written. Include trackbacks in your current articles to related items from years ago. This will help you both in search rankings and in click throughs. If you can get someone interested enough to keep clicking through to different pages on your site, you’re on your way to having a repeat visitor.


Assemble articles into an e-book. This is a great way to re-use and repackage work that you have already done. After you’ve published a few articles, take the most popular ones and package them into an e-book that you can give away or sell for a tidy little profit.


When referencing content, do not duplicate the content. This will penalize your position in search results. If you need to have more than one location for your content, use different links or alter your content slightly. You should always do your best to offer interesting and quality content on your website.


As was stated in the beginning of the article, one of the best ways to get your business or product known, is by using article marketing. Now that you have been provided with crucial advice on this subject, you are on your way to using article marketing the proper way, in order to generate more income.

Peninsula Remodelers, House Of Girth, Whippoorwill Farm CSA, Card Analysis Solutions, Shuntegossessq, DN Creative Kids, Allen Compassing Retreats, Dilcon Painter, Georgia Great Steak Cook Off, Nationwide Movers And Storage, Embrace Design Orthotics, A And B Towing, Airduct Services DC, Hunter Liguore, Responsive Utah, Ethical Finance Forum, Sustainable Communities States, The Ad Fellows, Youtube Toolbox, Amy Beth Anders, Neu Tech Solutions, Know When To Say No, Utapao Taxi Service, Selfmade Scholars, Agape Plumbing, Monterey Bay Dental Hygienists Association, Spiel Hack, The Recycling Foundation, World Of Arya, I Dare To, Windward Solar, Dental PR News, The Shields Design, Valley Vision Paints, Better All Around Truck, Dispatch Tree Manager Pro, Tree Service Austin, Arise Org, ABC Pool Services, Kings Highway Bid.


Commercial HVAC Systems Explained

HVAC

A commercial HVAC system facilitates three different processes: heating, ventilation, and air conditioning. The HVAC system is controlled by a central thermostat. Furnaces, for example, use a gas valve to ignite a burner to heat up the air inside the building. The heat from the burner then circulates through a heat exchanger, causing it to become hotter. The hotter air then pushes through a condenser, where it converts back to gas and is expelled.HVAC

Another type of commercial HVAC system is known as a variable refrigerant volume or VRF. These two terms refer to the same system and can be used interchangeably. VRF or VRV systems use a single outdoor condenser and multiple indoor units to heat and cool the building. They are a great choice for medium-sized applications. They also work great in multi-zone buildings. Here are some differences between the types of Commercial HVAC systems.

Simple systems use direct expansion heating and cooling. These units use electricity or oil to heat the air. In addition, they use the main furnace that heats the air. These systems are typically more space-efficient and require less drainage than complex ones. Commercial HVAC systems can also incorporate geothermal heat pumps. The geothermal heat pumps work by concentrating heat from underground reservoirs, making them a renewable energy source. They are also more energy efficient.

While residential HVAC systems have many advantages, commercial systems are typically larger and louder. A rooftop commercial HVAC system is a great option because it avoids potential noise disturbances and gives technicians a safe place to work. The rooftop system can also be modified to expand the capacity as needed. A modular system can be added as needed without disrupting the building’s occupants. This allows for increased efficiency while minimizing maintenance costs. So, consider the benefits of a modular commercial HVAC system.

Residential HVAC is typically more personal and requires more direct interactions with customers. The customer is often a single contractor or family. Commercial HVAC, however, works with multiple stakeholders. Most jobs are negotiated by a company, and contractors send invoices to the billing department. This means that a commercial HVAC worker doesn’t have much opportunity to make social connections. This isn’t to say that there are no benefits to commercial HVAC careers. These jobs are lucrative and highly sought after, and there are many ways to prepare for success. Adding certification to your resume is one of the best ways to make your application stand out from the competition.

Commercial HVAC systems are complex and often require specialized equipment and technicians. Attempting to repair these systems on your own may not be as effective as a professional. Keeping a checklist of maintenance tasks is a great way to prevent costly repairs and maintain a quality system. The commercial HVAC systems should be robust, durable, and highly sophisticated. There are many things that you should consider when selecting an HVAC contractor. So, before hiring a contractor, make sure that you know the best way to care for your building. It can make all the difference.

The two main types of commercial HVAC systems are split-split and packaged. Single-split units feature an outdoor unit and an indoor air handling unit. Single-split ductless units are great for small commercial spaces. Multi-split systems, on the other hand, contain multiple indoor air handling units that can be individually controlled. The key difference between the two is that single-split systems are usually located outside, while multi-split systems require several indoor units.

Single-split systems are the least expensive type of commercial HVAC system, suitable for small buildings. The individual heating and cooling capacities of these systems can be controlled through a thermostat or control panel. Single-split systems need an outdoor space for the outdoor units. However, they are inexpensive compared to central systems. Single-split systems are perfect for server rooms, smaller commercial buildings, and small-scaled business spaces. The most important consideration for any HVAC system is your budget and lifespan.

The commercial HVAC industry is closely related to the commercial real estate and retail industries. Because of the recent Covid-19 outbreak, commercial spaces have undergone a dramatic change in their structure. While residential HVAC professionals tend to earn slightly less than their commercial counterparts, they can supplement their hourly pay with commissions on sales. For this reason, residential HVAC professionals should be aware that the job is more demanding than the former. It is essential that commercial HVAC professionals maintain proper health standards in both types of environments.

Home Improvement Ideas on a Budget

Getting new floors in your house may seem like a good idea, but there are hidden costs that many homeowners don’t realize. Installing new floors may also reveal problems with your foundation. The good news is that there are several cost-effective home improvement ideas that don’t require a professional contractor. If you’re on a budget, you don’t have to sacrifice your dream of a beautiful home. Just consider these tips when you’re planning a home improvement project:

Adding natural plants can give a room a completely new look. They brighten up a room, making it more inviting and welcoming. You don’t need to hire a contractor or spend a fortune to install a planter. You can even make your own planters out of recycled materials! You can install a variety of plants on your walls, adding a pop of color to your home. Whether you’re going for a more modern look, a more classic look, or something in between, there are many ways to change the look of your space.

Plants are a great way to add color and life to your home. The bright colors of plants will bring life to any room and make it more inviting to visitors. Adding live plants to a room can help create a warm and cozy environment that’s perfect for entertaining guests. The best thing about planters is that they don’t require expensive materials. Instead, you can make your own with recycled materials or old materials. A planter is an inexpensive way to improve the look of your home without breaking the bank.

Another affordable home improvement idea is adding natural plants to your home. Bringing in a variety of flowers, ferns, and other plants can make any room look brighter, livelier, and more inviting. A planter is one of the best home improvement ideas on a budget. You don’t have to spend a lot of money to add planters. You can also use used pots, wine crates, and other discarded objects to make the planter.

A planter can be made from old bottles of wine and other household items. This can be a great home improvement idea for a limited budget. For example, you can replace your old vases with more modern ones. If you’re on a budget, you can install a planter by using recycled materials. If you don’t have any of these, you can purchase inexpensive planters. The best part about these ideas is that they are low-cost.

An accent wall is a great way to make a room look more spacious. A wall with accent colors can also be used to add a pop of color to an otherwise bland room. While accent walls can transform an entire room, they can be a significant investment. The cost of an accent wall is usually dependent on the size of the accent wall. In contrast, a painted wall of fully white or taupe can be a very expensive home improvement.

Adding natural plants is another great home improvement idea that can make any room look more inviting. Aside from bringing nature into your home, they also make your living space brighter and more welcoming. By installing planters in your living spaces, you can make them look more inviting to visitors. While you don’t have to buy expensive planters, you can use used pots and other household items to create a planter. This home improvement idea is one of the best on a budget.

Natural plants can make your living space look more inviting. These plants can make any room bright and lively. They also make a room feel more welcoming. If you are on a budget, installing planters in your home can be an easy home improvement idea. There are many different types of planters, and you don’t have to buy anything new. You can also use old pots, and reuse other materials to create a planter.

If you are on a budget, an accent wall is an affordable, time-saving home improvement idea. It can make a difference in the look of a room, as natural plants can make it look more welcoming. And because it doesn’t require a lot of money and time, it’s a perfect home improvement idea for a budget. A fully white or taupe wall is a classic choice. However, you can use an accent color to give your room a pop of color.